
Mastering the Craft: A Comprehensive Guide on How to Install Trim Around a Door
Introduction
Trim adds the finishing touch to any interior, providing a polished and aesthetically pleasing look. When it comes to doors, installing trim not only enhances the visual appeal but also conceals gaps and imperfections. In this step-by-step guide, we’ll explore the process of installing trim around a door, offering valuable insights for both beginners and seasoned DIY enthusiasts.
Materials and Tools
Before diving into the installation process, gather the following materials and tools:
Materials:
- Trim Pieces: Choose a style and material that complements your interior design.
- Wood Glue: For secure adhesion.
- Finishing Nails: Ensure they are long enough to penetrate the trim and door frame.
- Wood Filler: To fill nail holes and gaps.
- Sandpaper: For smoothing surfaces.
Tools:
- Miter Saw: For precise angle cuts.
- Nail Gun or Hammer: For securing trim in place.
- Level: To ensure the trim is straight and aligned.
- Measuring Tape: For accurate measurements.
- Pencil: To mark cut lines and measurements.
- Coping Saw: For coping inside corners.
Step-by-Step Installation Guide
1. Measure and Cut the Trim
Begin by measuring the dimensions of each side of the door frame. Use a miter saw to cut the trim pieces at 45-degree angles for each corner. Remember to measure twice and cut once to ensure accuracy.
2. Dry Fit the Trim
Before attaching the trim permanently, do a dry fit to check the accuracy of your cuts. This step allows you to make any necessary adjustments before applying adhesive or nails.
3. Apply Wood Glue
Apply wood glue to the back of the trim pieces. This ensures a strong bond between the trim and the door frame. Be mindful not to use excessive glue that may squeeze out when pressure is applied.
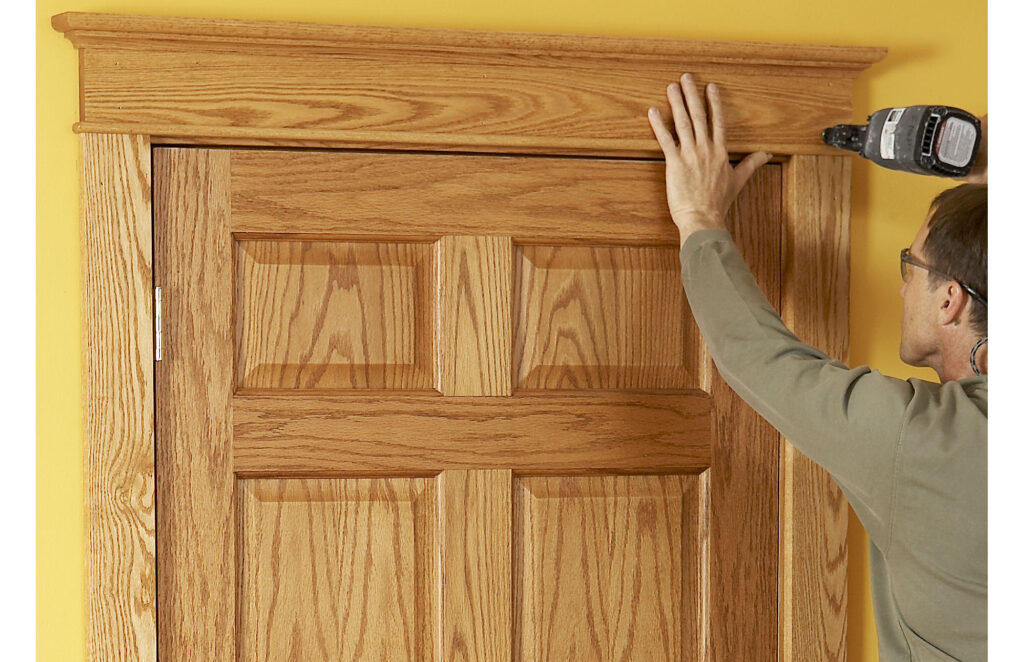
4. Secure the Trim with Nails
Using a nail gun or hammer, secure the trim in place. Nail through the trim into the door frame, making sure the nails are countersunk to allow for wood filler later. Repeat this process for all sides of the door frame.
5. Check for Level and Plumb
Use a level to ensure the trim is straight and plumb. Make any necessary adjustments before the glue dries.
6. Fill Nail Holes and Gaps
Once the trim is securely in place, fill the nail holes and any gaps between the trim and the door frame with wood filler. Allow the filler to dry completely before sanding the surfaces smooth.
7. Sand the Trim
Sand the entire surface of the trim to create a smooth and even finish. Pay attention to any edges or corners that may need additional smoothing.
8. Apply Paint or Stain
Finish the trim by applying paint or stain according to your preference. Allow sufficient drying time between coats.
9. Address Inside Corners with Coping
For inside corners, use a coping saw to cut one piece of trim to fit the profile of the other. This creates a seamless joint for a professional finish.
10. Final Inspection
Conduct a final inspection to ensure everything is secure, level, and aesthetically pleasing. Make any touch-ups as needed.
Frequently Asked Questions (FAQs)
1. Can I install trim without a miter saw?
Yes, you can use a miter box and a hand saw for straight cuts. However, a miter saw provides more precision, especially for angled cuts.
2. What type of wood glue is best for trim?
A high-quality wood glue, such as carpenter’s glue, is suitable for trim installation. Ensure it’s compatible with the type of wood you’re using.
3. How do I choose the right trim style?
Consider the overall aesthetic of your space. Traditional homes often feature crown molding, while modern spaces may opt for simpler, sleek profiles.
4. Can I install trim on a metal door?
Yes, you can install trim on a metal door using construction adhesive designed for metal surfaces.
5. What’s the purpose of coping inside corners?
Coping creates a snug fit between two pieces of trim in inside corners, ensuring a seamless joint that resists gaps over time.
6. Should I paint or stain the trim?
The choice between paint and stain depends on your preference and the style of your interior. Paint offers a clean and customizable finish, while stain enhances the natural beauty of the wood.
7. Can I install trim on a pre-hung door?
Yes, you can install trim on a pre-hung door. Measure the dimensions carefully and follow the same installation steps.
8. How do I fix gaps between the trim and the door frame?
Use wood filler to fill any gaps between the trim and the door frame. Sand the filler once dry for a seamless finish.
9. What’s the ideal nail length for trim installation?
Choose nails that are long enough to penetrate both the trim and the door frame without protruding excessively. 2-inch finishing nails are commonly used.
10. How long should I wait before painting or staining the trim?
Wait until the wood filler is completely dry before painting or staining the trim. Follow the product instructions for specific drying times.
Conclusion
Installing trim around a door is a rewarding DIY project that can elevate the look of your interior space. With the right tools, materials, and attention to detail, you can achieve professional-looking results. Follow this comprehensive guide, and you’ll be well on your way to mastering the art of installing trim around doors, adding a touch of sophistication to your home.