
How to Draw Palm Trees: A Comprehensive Guide
Drawing palm trees can be a delightful and rewarding experience, whether for artistic expression, decorating a space, or simply enjoying the process of creating. This guide will provide you with detailed instructions, tips, and techniques to help you draw realistic and stylized palm trees. We will cover everything from basic shapes to intricate details, ensuring that you can create beautiful palm trees in various styles.
Understanding Palm Trees
Characteristics of Palm Trees
Palm trees are unique plants that belong to the family Arecaceae. They are characterized by:
- Long, slender trunks: Most palm trees have tall, straight trunks that can vary in thickness.
- Fan-shaped or feather-like leaves: The leaves, known as fronds, can be either palmate (fan-shaped) or pinnate (feather-like).
- Growth habit: Many palms grow tall without branching, while some have multiple trunks.
Types of Palm Trees
There are numerous species of palm trees, each with distinct features. Here are a few popular ones:
| Palm Tree Type | Description |
|---|---|
| Coconut Palm | Known for its tall trunk and large fronds; produces coconuts. |
| Date Palm | Features a stout trunk and produces dates; often found in desert areas. |
| Royal Palm | Tall and elegant with a smooth trunk; often used in landscaping. |
| Sago Palm | Not a true palm but resembles one; has stiff leaves and a short trunk. |
Materials Needed for Drawing Palm Trees
Before you start drawing, gather the following materials:
| Material | Purpose |
|---|---|
| Pencils | For sketching the initial outlines. |
| Erasers | To correct mistakes and refine your drawing. |
| Fine-tipped Markers | For outlining and adding details. |
| Colored Pencils or Markers | To add color to your drawing. |
| Drawing Paper | A good quality paper for sketching and coloring. |
Step-by-Step Guide to Drawing Palm Trees
Step 1: Sketch the Trunk
- Draw the Base: Start by drawing a slightly curved line for the trunk’s base.
- Shape the Trunk: Extend the line upward, making it wider at the bottom and tapering it as it goes up. The trunk should have a slight curve to give it a natural look.
- Add Texture: Use short, curved lines along the trunk to represent the bark’s texture.
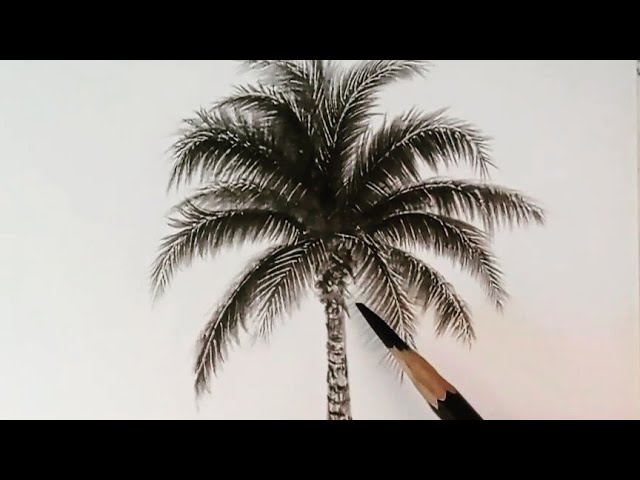
Step 2: Outline the Leaves
- Determine Leaf Placement: At the top of the trunk, draw a small circle or oval to indicate where the leaves will emerge.
- Draw Leaf Guidelines: From this point, sketch several lines extending outward to represent the main veins of each frond.
- Shape the Leaves: Around each guideline, draw curved lines that taper at the ends to create the leaf shapes.
Step 3: Detail the Leaves
- Add Texture to Leaves: Use short strokes along the edges of each leaf to create texture and depth.
- Draw Leaf Segments: If you’re drawing pinnate leaves, add smaller lines along each leaf segment to represent leaflets.
Step 4: Finalize the Drawing
- Outline with Marker: Once satisfied with your pencil sketch, carefully outline your drawing with fine-tipped markers.
- Erase Pencil Lines: After the ink has dried, gently erase any remaining pencil marks.
- Add Color: Use colored pencils or markers to fill in your palm tree. Common colors include shades of green for leaves and browns for the trunk.
Step 5: Create Background Elements (Optional)
To enhance your drawing:
- Add elements like clouds, sun, or ocean waves in the background.
- Draw additional palm trees for a tropical scene.
Tips for Drawing Realistic Palm Trees
- Study Real Palm Trees: Observe real palm trees or photographs to understand their structure and details better.
- Practice Different Styles: Experiment with various styles—cartoonish versus realistic—to find what suits you best.
- Use Reference Images: Keep reference images handy while drawing to guide proportions and details.
Common Mistakes to Avoid
- Overly Straight Trunks: Ensure your trunks have slight curves for realism.
- Uniform Leaf Shapes: Vary leaf sizes and shapes for a more natural look.
- Neglecting Background Elements: Adding context enhances your overall composition.
Frequently Asked Questions (FAQ)
Q1: What type of paper is best for drawing palm trees?
A1: Use medium-weight drawing paper that can handle pencil and ink without bleeding.
Q2: Can I draw palm trees digitally?
A2: Yes! Digital drawing software allows you to use similar techniques as traditional methods.
Q3: How do I make my palm tree look more three-dimensional?
A3: Add shading along one side of the trunk and leaves using darker colors or pencil strokes.
Q4: What colors should I use for realistic palm trees?
A4: Use various shades of green for leaves (light green for highlights and dark green for shadows) and browns or grays for trunks.
Q5: How long does it take to learn how to draw palm trees?
A5: It varies by individual; with practice, you can improve significantly within weeks.
Conclusion
Drawing palm trees is an enjoyable activity that allows you to express creativity while improving your artistic skills. By following this comprehensive guide, practicing regularly, and experimenting with different styles, you’ll be able to create beautiful representations of these iconic trees in no time.For further information on palm trees and their characteristics, consider visiting Wikipedia.